
Volvo XC90 timing belt installation 2007-2011

Volvo XC90 2008
Remove:
the cable from the battery negative terminal.
First read see BATTERY, DISCONNECTING.
the cross stay between the suspension turrets
NOTE: As the illustrations in this service information are used for different model years
and / or models, some variation may occur. However, the essential information
is always correct.
CAUTION: There are a number of versions of the variable valve timing unit. Therefore
it is extremely important to always read the information referring to the
engine variant/model year to be remedied.
NOTE: Crankshaft and camshafts must not be turned more than is stated in the method
description If the shafts are turned in any other way the valves may be damaged.
the air intake hose for the turbocharger (TC) from the air cleaner (ACL) cover. Put to one side
the upper timing belt cover
the cover over the ignition coils
the upper engine stabiliser brace
the camshaft position (CMP) sensor housing
the trigger wheel
the servo reservoir and the expansion tank. Lift up and place on top of the engine.
the auxiliaries belt
the front timing belt cover.
ALIGNING THE ENGINE ACCORDING TO THE MARKING

Crankshaft And Camshafts Markings
Raise the car.
WARNING: Ensure that no power steering fluid is spilled. Extremely flammable.
Remove:
the right front wheel
the nuts for the cover in the wing liner.
Install the upper timing belt cover.
Turn the crankshaft clockwise until the markings on the crankshaft and camshaft pulley correspond.
Turn the crankshaft a further 1/4 of a turn clockwise, then turn back counter-clockwise until the markings correspond.
The markings are illustrated.
Remove the upper timing belt cover.
REMOVING THE TIMING BELT
Belt Tensioner
Slacken off the belt tensioner
Slacken off the centre screw for the belt tensioner slightly
Hold the centre screw still. Turn the tensioner eccentric clockwise to 10 o’clock using a 6 mm Allen key
Remove the timing belt from the camshaft pulleys.
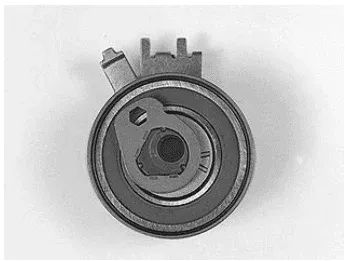
REMOVING THE TIMING GEAR PULLEY WITH THE VARIABLE VALVE TIMING UNIT

Camshaft Adjustment Tool 999 5452 Installed
Use camshaft adjustment tool:
Install camshaft adjustment tool see 9995452 at the rear of the camshafts.
First screw in the part of the tool intended for the exhaust camshaft (drilled hole)
Then carefully turn the exhaust camshaft clockwise with the camshaft adjustment tool until the intake
camshaft tool can be applied (threaded hole)
Install the intake camshaft adjustment tool.
Camshaft Adjustment Tool 999 5452 Installed
Screw the camshaft adjustment tools together.
Remove:
the plug at the front edge of the variable valve timing unit (TORX 55)
the centre screw in the variable valve timing unit (TORX 55). Carefully pull out the timing gear pulley
with the variable valve timing (VVT) unit.
REPLACING THE CAMSHAFT SEAL
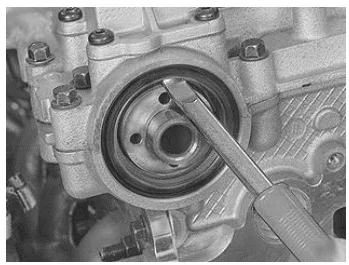
Identifying Front Camshaft Seal And Special Tool 999 5651
Carefully press in tool see 9995651 between the sealing ring and the camshaft. Carefully pry out the seal.
Cleaning
To clean the shaft journal and mating surface, use emery cloth P/N 951 1024.
NOTE: Use paper to collect any spilled oil under the variable valve timing units.
NOTE: When cleaning work around the shaft journal, not in and out. It is essential that
any residue from the emery cloth and any other contaminants are completely
removed before the new sealing ring is installed.
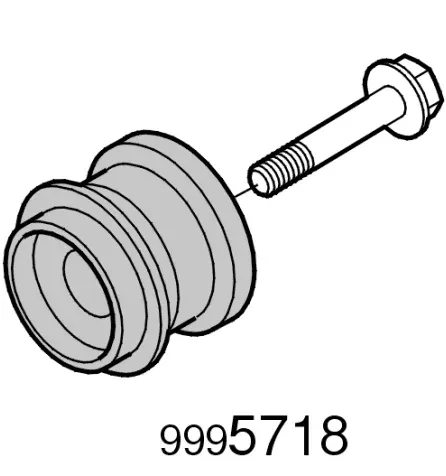
Drift 999 5718
Lubricate the new seal. Install the new seal for the exhaust camshaft. Use drift see 9995718 .
INSTALLATION
CHECKING AND ADJUSTING THE VARIABLE VALVE TIMING UNIT
Check and adjust the variable valve timing unit. See: VARIABLE VALVE TIMING UNIT, CHECKING AND ADJUSTING
INSTALLING COMPONENTS
Install:
the front timing belt cover.
the torque rod bracket
the cover over the ignition coils
the upper timing belt cover
the auxiliaries belt
the expansion tank
the servo reservoir. Check that the hoses are correctly positioned
the starter motor. Tighten the screws at the gearbox to 40 Nm . Tighten the support bracket screw to 25
Nm
the charge air pipe between the throttle body (TB) and the charge air cooler (CAC).
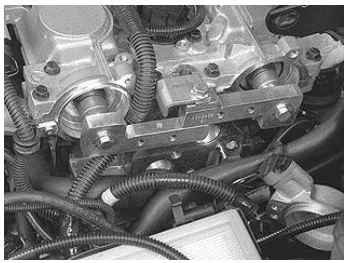
Engine Compartment Components
Install:
the trigger wheel
the camshaft position (CMP) sensor housing and a new cover
the intake air hose between the turbocharger (TC) and the air cleaner (ACL) cover
the engine stabiliser brace. Tighten the screws at the suspension turrets and the screw for motor bracket
the negative battery cable. First read see BATTERY, DISCONNECTING .
CHECKING THE ENGINE
Test drive the car to check the function of the engine.